How do I change the font style?
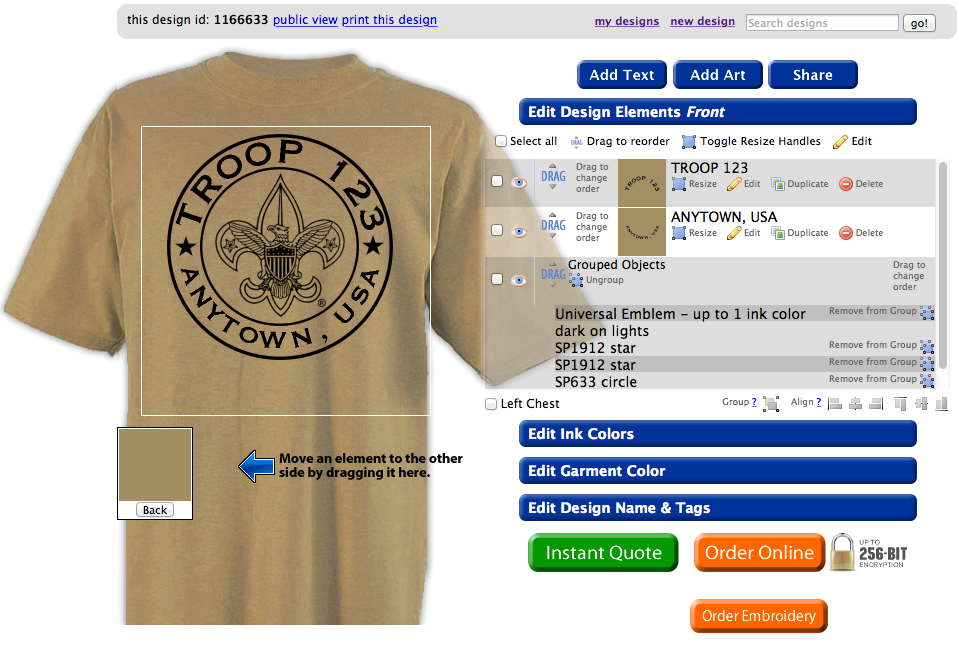
When in the Design Editor for your design you should see a Design Elements menu to the right of the picture of the shirt.
There are two different lines of text in this particular design but this will change to match the specific design you will be customizing. Once you decide what text you want to change, press the Edit button with the pencil graphic found beneath the chosen text.
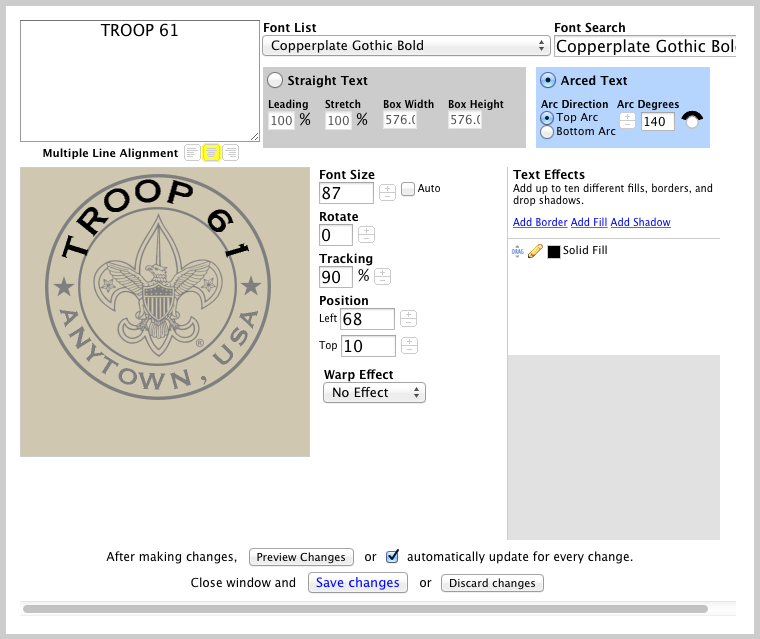
Once you have the edit page open, there are three important sections of the edit page that we will go through. The first is the box on the far top left of the edit page. You should see the text as written. If you go in and type the correct text in to the box, the changes will appear in the preview.
You might notice that the text you add is bigger or smaller than the previous text. This might result in off centered or misaligned text. Don’t worry! That’s why we have an art team here. All we need you to do is decide what style font and we’ll do all the cleaning up.
You can change your font style by choosing from the Font List drop down menu or type the name of a specific font using the Font Search box. Both of these options are located to the right of the text box. You can browse our available Font styles here: 5,006 fonts in 52 different categories for your custom t-shirt design!
You can manipulate your text using several of the options available. Choose Straight or Arced Text be lost the font style options. Add borders or shadows (and change the font fill color) on the right side of the Font Editor. Change font size, rotate, even add warp effects in the center, or if you prefer, call us up and have us do some of the more difficult changes, we’re always happy to help!
Click the “Save Changes” button to update your design, or “Discard Changes” to leave the Font Editor without updating your design.


